|
学习https://matplotlib.org/gallery/index.html 记录,描述不一定准确,具体请参考官网
Matplotlib使用总结图 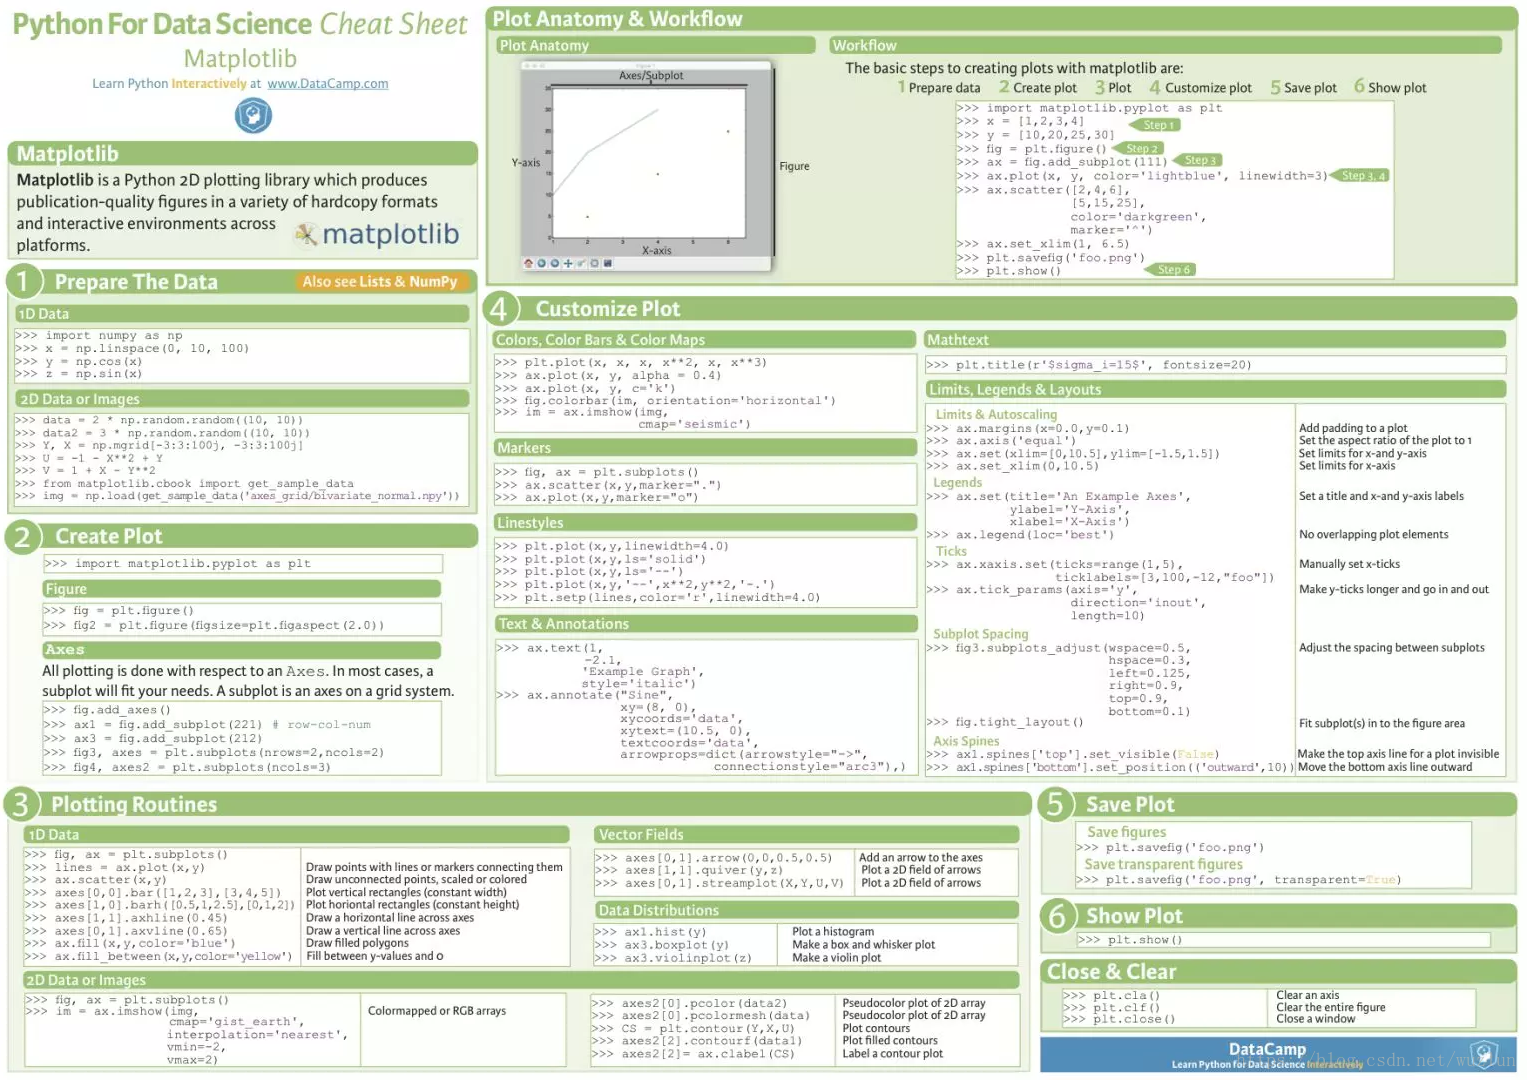
# 使用该魔法,不用写plt.show(),以及可以边写边运行
%matplotlib notebook
import matplotlib.pyplot as plt
plt.rcParams['font.sans-serif']=['SimHei'] # 用来正常显示中文标签
plt.rcParams['axes.unicode_minus']=False # 用来正常显示负号
import pandas as pd
import numpy as np
标题及轴标签
def f(t):
s1 = np.cos(2*np.pi*t)
e1 = np.exp(-t)
return s1 * e1
t1 = np.arange(0.0, 5.0, 0.1)
t2 = np.arange(0.0, 5.0, 0.02)
t3 = np.arange(0.0, 2.0, 0.01)
box = dict(facecolor='yellow', pad=5, alpha=0.2)
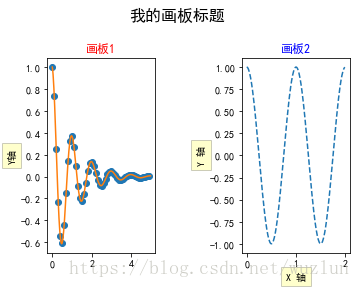
# 整个画板的标题
plt.suptitle('我的画板标题', fontsize=16, fontweight='bold')
plt.subplots_adjust(left=0.2, wspace=0.8, top=0.8) #位置调整
plt.subplot(121)
plt.plot(t1, f(t1), 'o', t2, f(t2), '-')
plt.title('画板1',color='r')
plt.ylabel('Y轴',bbox=box)
plt.subplot(122)
plt.plot(t3, np.cos(2*np.pi*t3), '--')
plt.title('画板2', color='b')
plt.xlabel('X 轴',bbox=box)
plt.ylabel('Y 轴',bbox=box)
plt.show()
样式
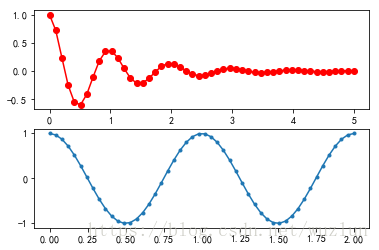
x1 = np.linspace(0.0, 5.0)
x2 = np.linspace(0.0, 2.0)
y1 = np.cos(2 * np.pi * x1) * np.exp(-x1)
y2 = np.cos(2 * np.pi * x2)
plt.subplot(2, 1, 1)
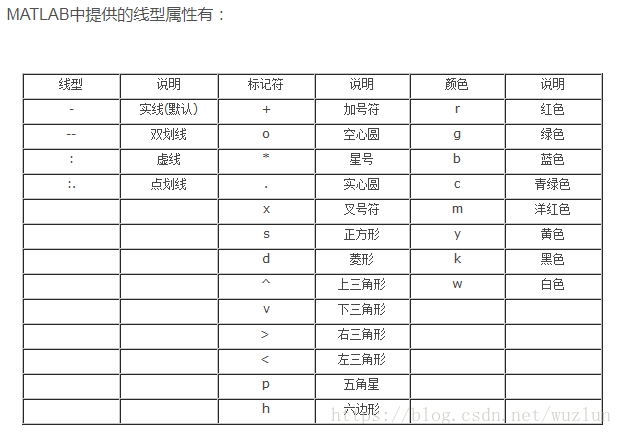
# "o-r"中r表示红色,o表示实点,-表示连接线
# 可以写成 ro- 或 or- 或 -or 顺序不要求
plt.plot(x1, y1, 'o-r')
plt.subplot(2, 1, 2)
plt.plot(x2, y2, '.-')
plt.show()
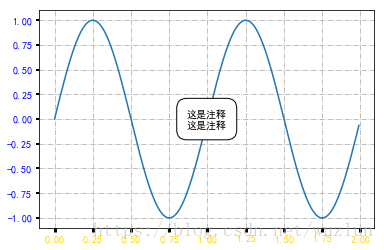
t = np.arange(0.0, 2.0, 0.01)
s = np.sin(2 * np.pi * t)
fig, ax = plt.subplots()
ax.plot(t, s)
# 网格
ax.grid(True, linestyle='-.')
# 坐标
# ax.tick_params(axis='both',labelcolor='r', labelsize='medium', width=3)
ax.tick_params(axis='x',labelcolor='gold', labelsize='medium', width=3)
ax.tick_params(axis='y',labelcolor='b', labelsize='medium', width=2)
# 注释
ax.annotate("这是注释\n"
"这是注释", (0.5, 0.5),
xycoords="axes fraction", va="center", ha="center",
bbox=dict(boxstyle="round, pad=1", fc="w"))
plt.show()
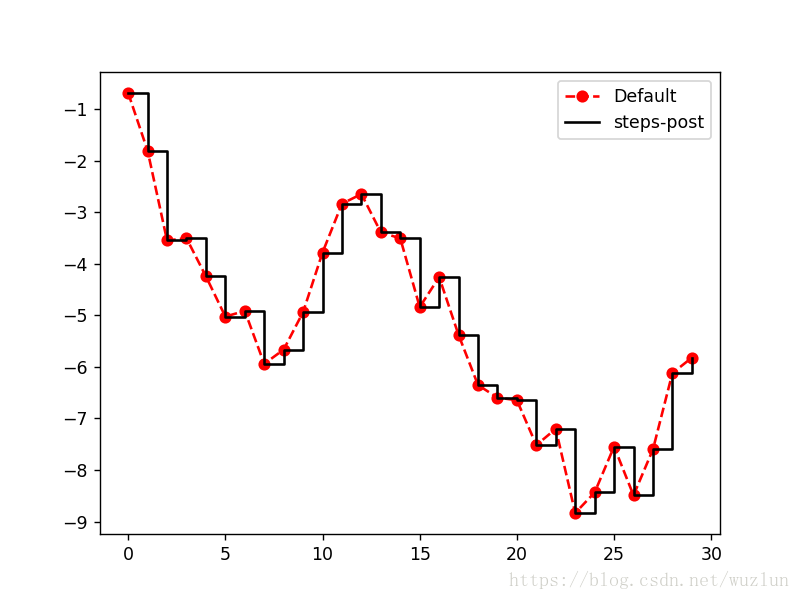
data = np.random.randn(30).cumsum()
plt.plot(data, 'r--', label='Default',marker='o')
# 写这步运行直接添加到上图中
plt.plot(data, 'k-', drawstyle='steps-post', label='steps-post')
plt.legend(loc='best')
使用内置样式
# 全部内置样式
from matplotlib import style
print(plt.style.available)
‘bmh’, ‘classic’, ‘dark_background’, ‘fast’, ‘fivethirtyeight’, ‘ggplot’, ‘grayscale’, ‘seaborn-bright’, ‘seaborn-muted’, ‘seaborn-notebook’, ‘seaborn-paper’, ‘seaborn-pastel’, ‘seaborn-poster’, ‘seaborn-talk’, ‘seaborn-ticks’, ‘seaborn-white’, ‘seaborn-whitegrid’, ‘seaborn’, ‘Solarize_Light2’, ‘tableau-colorblind10’, ‘_classic_test’
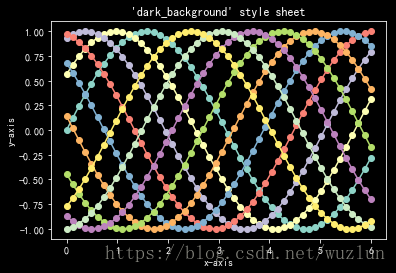
plt.style.use('dark_background')
fig, ax = plt.subplots()
L = 6
x = np.linspace(0, L)
ncolors = len(plt.rcParams['axes.prop_cycle'])
shift = np.linspace(0, L, ncolors, endpoint=False)
for s in shift:
ax.plot(x, np.sin(x + s), 'o-')
ax.set_xlabel('x-axis')
ax.set_ylabel('y-axis')
ax.set_title("'dark_background' style sheet")
plt.show()
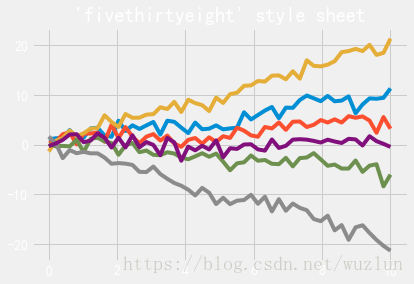
plt.style.use('fivethirtyeight')
x = np.linspace(0, 10)
# Fixing random state for reproducibility
np.random.seed(19680801)
fig, ax = plt.subplots()
ax.plot(x, np.sin(x) + x + np.random.randn(50))
ax.plot(x, np.sin(x) + 0.5 * x + np.random.randn(50))
ax.plot(x, np.sin(x) + 2 * x + np.random.randn(50))
ax.plot(x, np.sin(x) - 0.5 * x + np.random.randn(50))
ax.plot(x, np.sin(x) - 2 * x + np.random.randn(50))
ax.plot(x, np.sin(x) + np.random.randn(50))
ax.set_title("'fivethirtyeight' style sheet")
plt.show()
线条及填充
t = np.arange(-1, 2, .01)
s = np.sin(2 * np.pi * t)
#曲线
plt.plot(t, s)
# 以y轴0点画横线
plt.axhline(linewidth=8, color='#d62728')
# 画横线
plt.axhline(y=1)
# 画纵线
plt.axvline(x=1)
# Draw a thick blue vline at x=0 that spans the upper quadrant of the yrange
# plt.axvline(x=0, ymin=0.75, linewidth=8, color='#1f77b4')
# 画线段
plt.axhline(y=.5, xmin=0.25, xmax=0.75)
# 平行填充
plt.axhspan(0.25, 0.75, facecolor='0.5', alpha=0.5)
# 垂直填充
plt.axvspan(1.25, 1.55, facecolor='#2ca02c', alpha=0.5)
# 坐标轴
plt.axis([-1, 2, -1, 2])
plt.show()

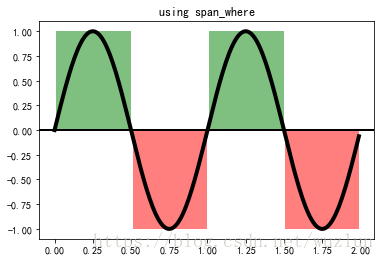
交差及填充
x = np.arange(0.0, 2, 0.01)
y1 = np.sin(2*np.pi*x)
y2 = 1.2*np.sin(4*np.pi*x)
fig, ax = plt.subplots()
ax.plot(x, y1, x, y2, color='black')
ax.fill_between(x, y1, y2, where=y2>y1, facecolor='green')
ax.fill_between(x, y1, y2, where=y2 0, facecolor='green', alpha=0.5)
ax.add_collection(collection)
collection = collections.BrokenBarHCollection.span_where(
t, ymin=-1, ymax=0, where=s1 < 0, facecolor='red', alpha=0.5)
ax.add_collection(collection)
plt.show()
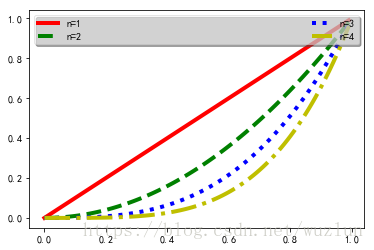
图例
ax = plt.subplot(111)
t1 = np.arange(0.0, 1.0, 0.01)
for n in [1, 2, 3, 4]:
plt.plot(t1, t1**n, label="n=%d"%(n,))
# plt.legend()
leg = plt.legend(loc='best', ncol=2, mode="expand", shadow=True, fancybox=True)
leg.get_frame().set_alpha(0.5)
plt.show()
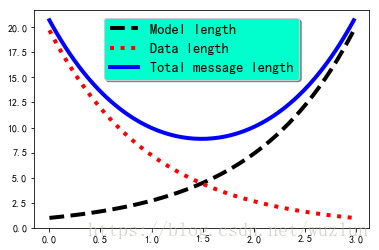
# Make some fake data.
a = b = np.arange(0, 3, .02)
c = np.exp(a)
d = c[::-1]
# Create plots with pre-defined labels.
fig, ax = plt.subplots()
ax.plot(a, c, 'k--', label='Model length')
ax.plot(a, d, 'r:', label='Data length')
ax.plot(a, c + d, 'b', label='Total message length')
legend = ax.legend(loc='upper center', shadow=True, fontsize='x-large')
# Put a nicer background color on the legend.
legend.get_frame().set_facecolor('#00FFCC')
plt.show()
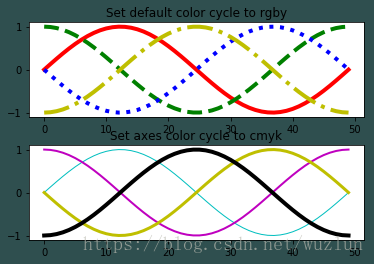
颜色
%matplotlib inline
from cycler import cycler
import numpy as np
import matplotlib.pyplot as plt
x = np.linspace(0, 2 * np.pi)
offsets = np.linspace(0, 2*np.pi, 4, endpoint=False)
# Create array with shifted-sine curve along each column
yy = np.transpose([np.sin(x + phi) for phi in offsets])
# 1. Setting prop cycle on default rc parameter
plt.rc('lines', linewidth=4)
plt.rc('axes', prop_cycle=(cycler('color', ['r', 'g', 'b', 'y']) +
cycler('linestyle', ['-', '--', ':', '-.'])))
fig, (ax0, ax1) = plt.subplots(nrows=2, facecolor='darkslategray')
ax0.plot(yy)
ax0.set_title('Set default color cycle to rgby')
# 2. Define prop cycle for single set of axes
ax1.set_prop_cycle(cycler('color', ['c', 'm', 'y', 'k']) +
cycler('lw', [1, 2, 3, 4]))
ax1.plot(yy)
ax1.set_title('Set axes color cycle to cmyk')
# Tweak spacing between subplots to prevent labels from overlapping
fig.subplots_adjust(hspace=0.3)
plt.show()
|